Search Starting Rules
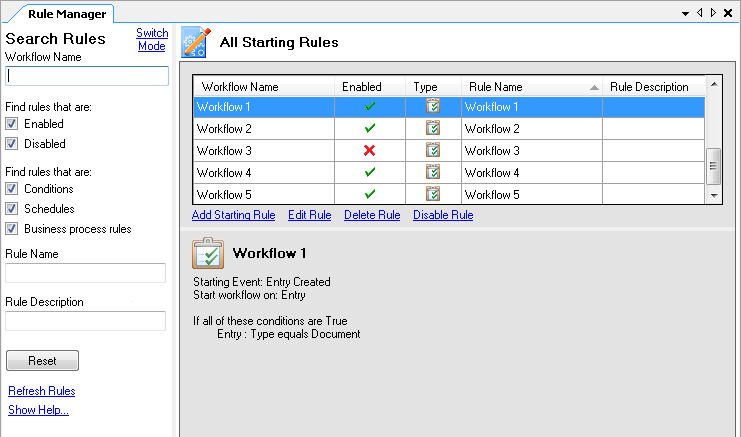
The Rule Manager Pane handles workflows and business processes in the same way.
![]() Show me a screenshot of this pane
Show me a screenshot of this pane
To open this pane
- Click Switch Mode at the top of the Rule Manager Pane.
To search for a rule
- You can search for a rule by a variety of criteria. The search results will dynamically update as you type search terms or apply search criteria.
- Workflow Name: Type the name of a workflow that is assigned the rule you want to find.
- Enabled/Disabled Rules: Select if you want to search for enabled and/or disabled starting rules.
- Condition/Schedule/Business Process Rules: Select if you want to search for a specific condition, schedule, and/or business process rule.
- Rule Name: Type the name of the rule you want to find.
- Rule Description: Type the rule description or keywords found in the rule description that you are looking for.
- To clear your search terms and criteria, click Reset.
- To update the list with recently created or changed rules, click Refresh Rules. Alternatively, right-click the list of rules and select Refresh.
To create or modify rules from this pane
- Select a rule, and click one of the following options to modify it.
- Add Starting Rule: Click this option to create a new rule. You can also right-click the rules list and select Add Condition Rule or Add Schedule Rule. The Select Workflow dialog box will open. Choose a workflow from the list to create a starting rule for. Click Create Rule. The Rule Wizard will open to let you configure the new condition or schedule rule.
- Edit Rule: Click this option to open the Rule Wizard and modify the selected condition or schedule rule. You can also modify a starting rule by right-clicking on a rule and selecting Edit, or by double-clicking a rule.
- Delete Rule: To delete a rule, select a rule and click Delete Rule. Alternatively, right-click a rule and select Delete, or you can select a rule and press DELETE on your keyboard. You will be prompted to confirm your choice.
- Disable Rule: To disable an enabled rule, select a rule and click Disable Rule. Alternatively, double-click the green check
 next to an enabled starting rule to disable the rule, or right-click an enabled rule and select Disable Rule.
 - Enable Rule: To enable a disabled rule, select a rule and click Enable Rule. Alternatively, double-click the red X
 next to a disabled starting rule to enable the rule, or right-click a disabled rule and select Enable Rule.
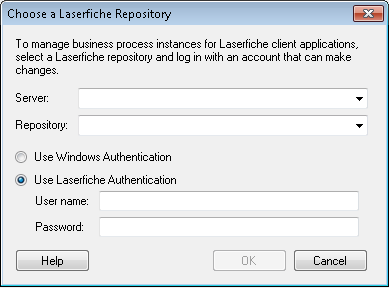
Note: When modifying a business process, the
 Laserfiche Server Login dialog box will prompt you to log in to a Laserfiche Server. This security check ensures that the business process is allowed to make changes to the Laserfiche client application that was chosen in the business process connection profile.
 - To copy a starting rule, right-click the rule, and select Copy. Right-click again on the list of rules, and select Paste. The Select Workflow dialog box will open. Choose a workflow from the list to create a starting rule for. Click Create Rule. The Rule Wizard will open to let you configure the copied rule.
Note: You cannot delete business process rules.
Note: A business process rule cannot be copied; however, conditions can be copied and pasted within or between business process rule editors.
To open or delete workflows from this pane
- Right-click the workflow and select one of the following:
- Select Open Workflow to open the workflow in the Designer Pane.
- Select Delete Workflow to delete the workflow. You will be prompted to confirm your decision. Click Yes to delete the workflow or click No to return to the Rule Manager Pane without deleting the workflow.

